Ink Drops and Chemical Reactions
Many of our projects involve some type of display with looping video content, whether that may be background video, or abstract organic footage. For many projects, we need hours of footage to work with. Our LED wall installation loops are at minimum 1 hour and up to 4 hour loops each. It would get pretty boring and tedious to watch a 30 second loop over and over.
Much of this may be created in software we use, such as After Effects, Houdini or Blender, etc. Many times we're trying to re-create a real-world effect via a programmed simulation. The benefit of doing this via software is you can have absolute control over the look and feel of it. The downside is the setup and programming involved. Render times can take days and weeks to render loops of this length.

Using real-time render engines such as Unreal, Unity, Touchdesigner or MaxMSP is amazing, but still requires hours and days of setup. We'll touch on that in another Labs post soon. This is a huge topic and is only limited by your own creativity.
I very much prefer the unknown and random magical results from shooting footage and manipulating that in DaVinci Resolve or After Effects. This still requires editing and rendering, but it's much much faster overall. Lately, I've been playing with liquid type effects, dropping ink drops into an aquarium and mixing those colors and shooting video of various chemical reactions, mixed with paint or food coloring, milk, oil, alcohol, etc.

We use our BlackMagic Pocket Cinema 6K with macro lenses and a variety of LED lighting fixtures. We shoot at 4K ProRes at 60P, as 6K is just too high bandwidth for our needs. For the ink drop and chemical reaction shoot, I shoot at home in my kitchen as it can get very messy. I tend to do 2 major shoots, one to test out what's possible, then the next day to figure out what more may be possible after reviewing all of the footage. We need a very bright light to shoot at 60P at a low ISO. I prefer to stick to no more than 400 ISO and I like to keep an F-stop of 11+ to maximize depth of field, as shooting closeups of ink drops in a large aquarium is tough to maintain focus otherwise.
When shooting ink drops in an aquarium, the first thing I noticed was the ink almost immediately clouds up the tank with that color, so you need to work fast and have your other colored ink drops ready to go. The hero area for the ink squirt or drops is pretty small so it's easy to miss the target, but sometimes that works to your advantage. I just keep the camera recording throughout the whole process and edit it only when changing the water. Sometimes just the slow swirl of ink in a cloudy tank looks absolutely amazing when lit well. I keep the LEDs taped to the sides of the outside of the tank and turn one or another off or dim them as needed. The biggest issue when shooting anything with liquids is bubbles. They tend to form on the walls of the aquarium and float around and look pretty bad on video. It takes a long time for them to go away on their own. If the aquarium isn't properly clean, there may be dust or hair floating around as well. It can look pretty gross. I like to use lens cleaning material to clean the inside and outside before filling with water.
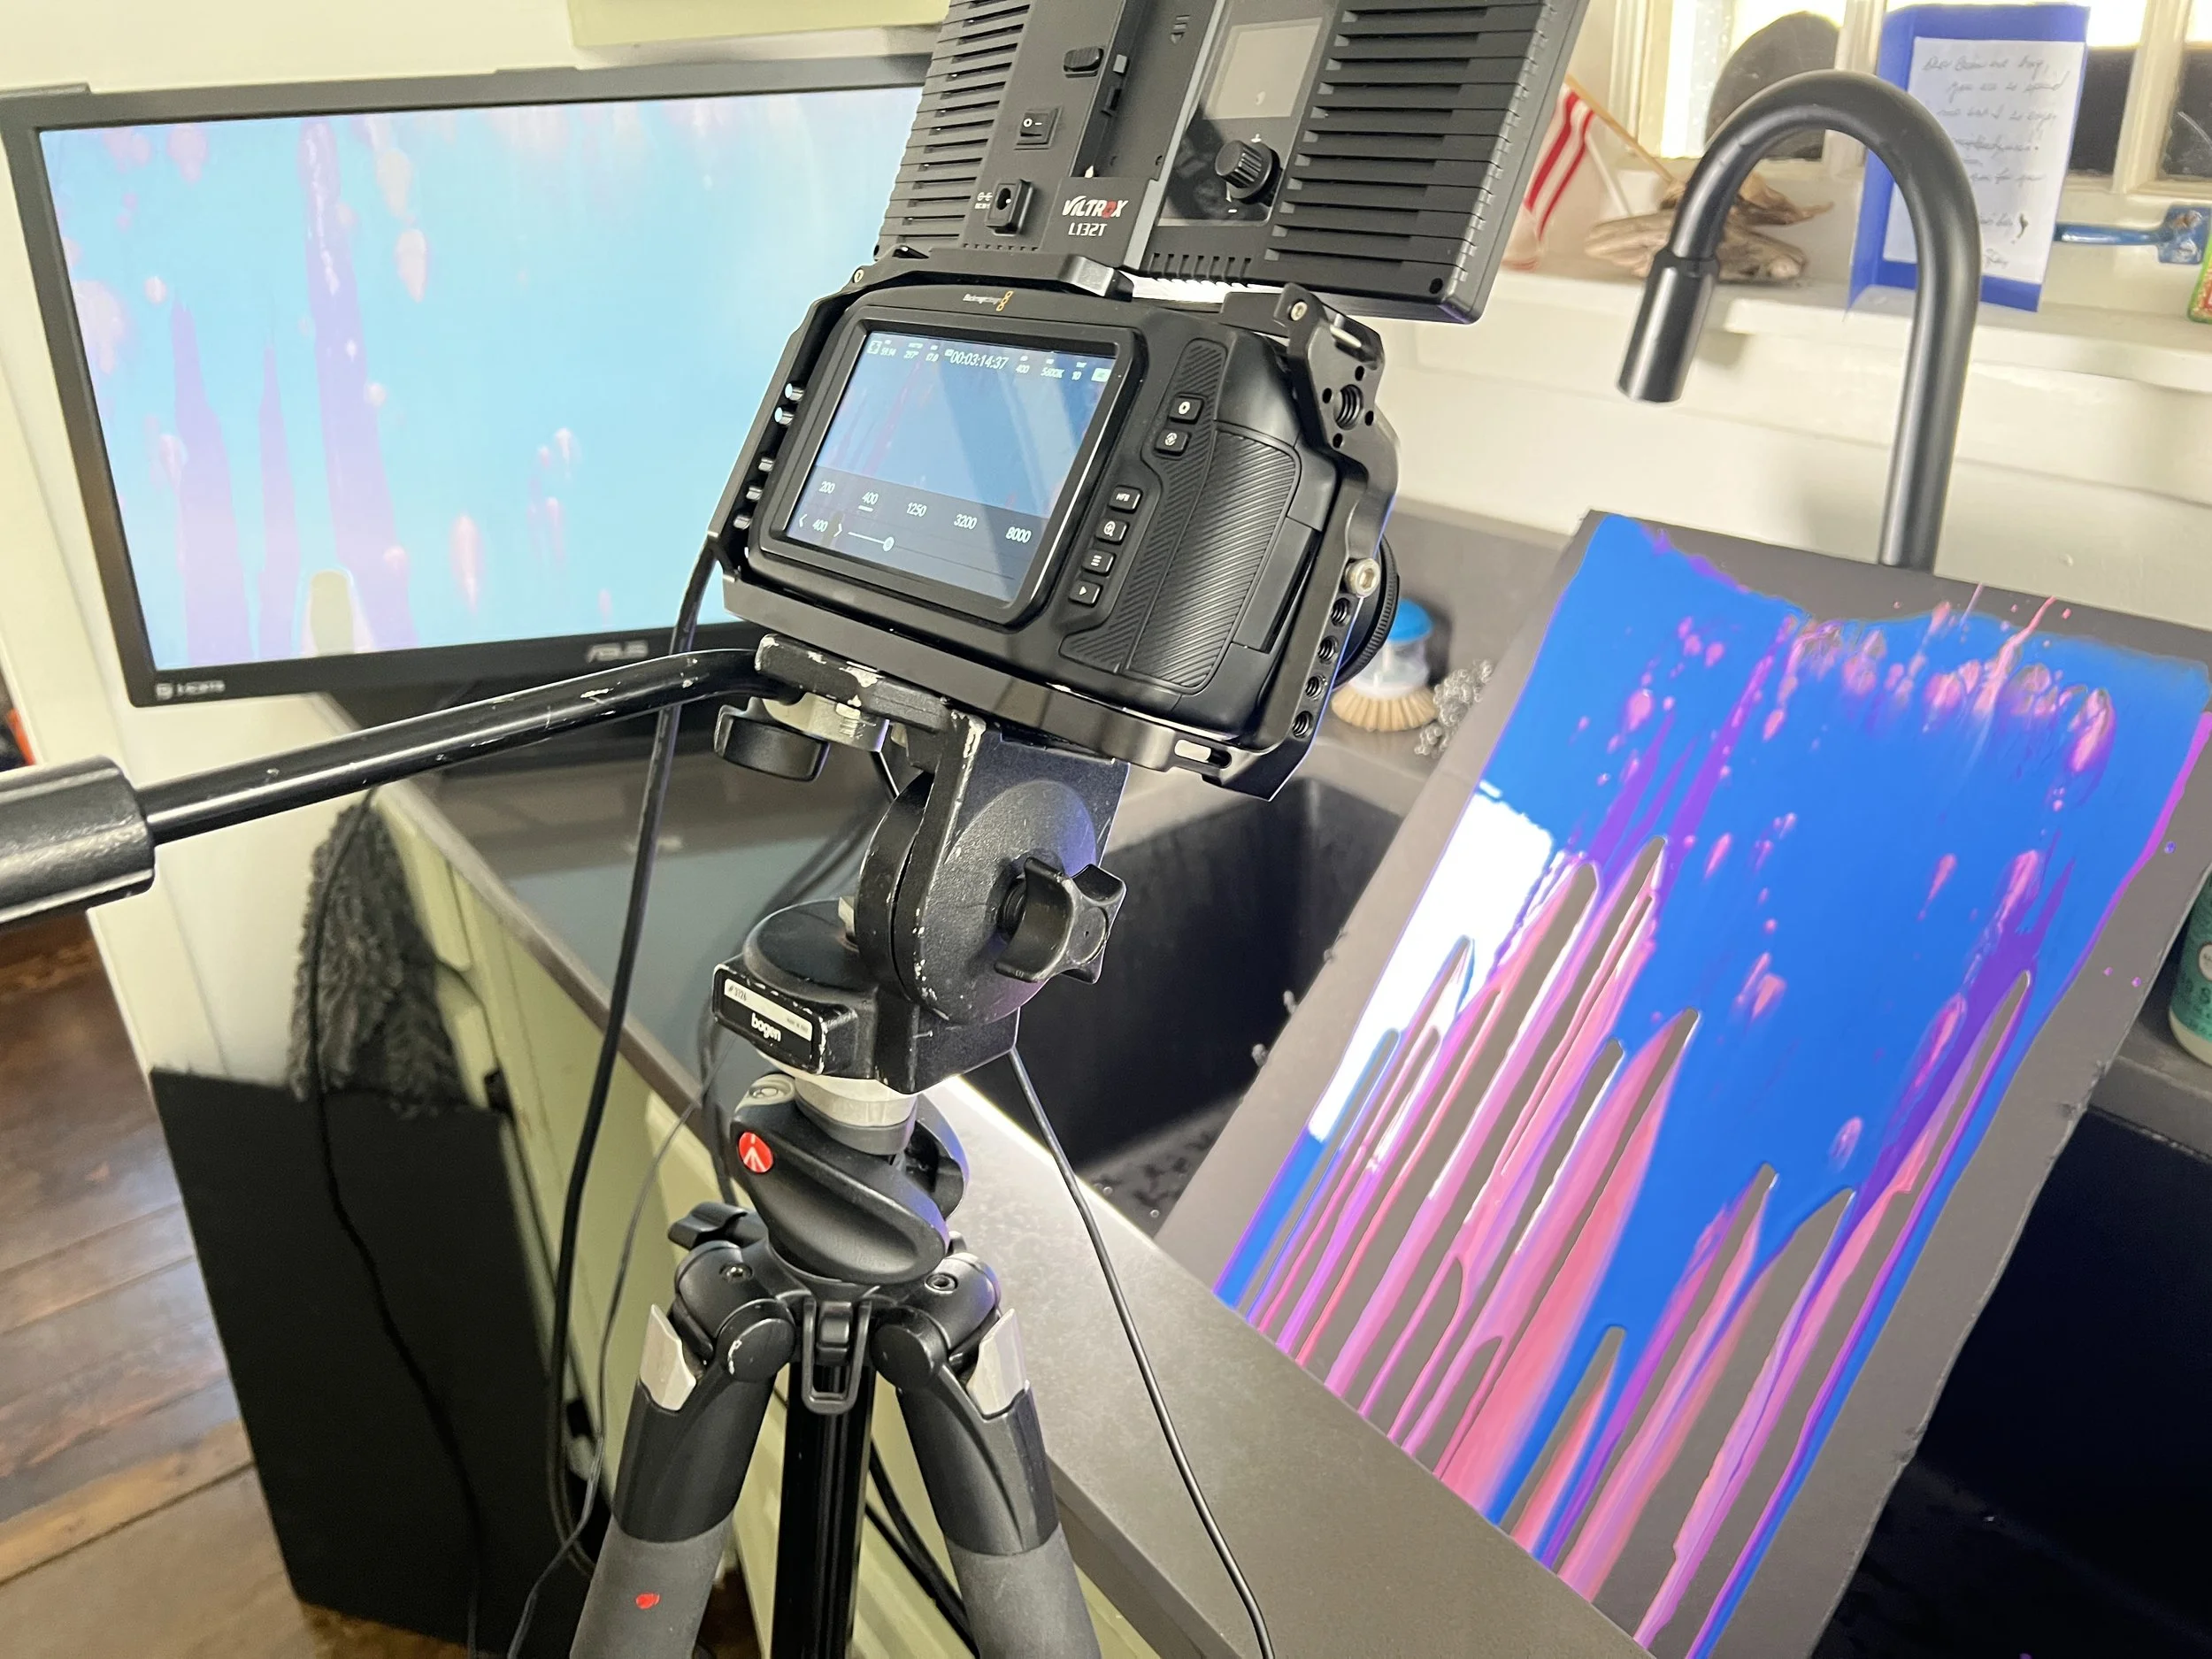
For the chemical reactions and paint type effects I'll either drip paint on a flat piece of cardboard or wood and/or have the camera overhead looking down into a petri dish. For future experiments, I just built a very slow rotating platform to create more movement in the liquid.

The problem with shooting these type of reactions is that the heavier liquids tend to sink to the bottom of the dish immediately so the window to get a good effect is limited. On the next shoot, I'll tilt the petri dish about 20 degrees and slowly spin it with the rig.
I only use Davinci Resolve for color correction and editing. It's amazingly fast to import and slam a quick edit together, then quickly color grade the footage. I take notes on what I think worked and what is missing. I like to set the composition frame-rate to 24 or 30 FPS and slow my footage down to about 25%. In the clip attributes, I set the Retime Process to Optical Flow and the Motion Estimation to Speedwarp. Doing this makes the render take quite a bit longer but is very high quality, so the slow motion looks absolutely mesmerizing. If the footage looks too noisy, I apply a Neat Video Noise reduction effect, which is pretty much perfect.

Author: Brian Dressel